http://thepaintbrushgoesspottie.blogspot.com.au/p/resume.htmlhttp://thepaintbrushgoesspottie.blogspot.com.au/p/publications.htmlhttp://thepaintbrushgoesspottie.blogspot.com.au/p/doodle-feathers.html 

Sunday, December 14, 2008

Scrapboxx Newsletter........


Free online class - Xmas Doodling layout with Leeann Pearce
Monday 15th December @ 7.00pm WA time and 9.00pm EST time

Click here to book your free spot SCRAPBOXX SHOP


How to:


Materials: Felt, Ribbon, Buttons, Cord, DMC thread, Stars, Holly Stamp, Paint


1: Cut 2 of each template, so you have a front and back.

2: Tie cord into loop and stitch to the back of the front.

3: Cut an extra circle out of white felt to make the icing.


Present Box: Machine stitch your cross on or hand stitch. Add your ribbon and button.

Then you can hand stitch the front and back together. Once you have finished stitching together use a pencil to stamp the spots.


Xmas pudding: Hand stitch the bottom icing first for detail and then add the buttons and holly leaves- add some detail to the leaves. Then you can stitch the front and back together. I also changed the color when stitching the icing and then red pudding.


Tree: Fold the trunk in half and slip between each felt piece. Now hand stitch together, when you get to the top add the star and just pierce another hole. Once you have finished stitching together use a pencil to stamp the spots.


Note: Make sure you add the cord to the back of the front piece. This way the back is nice and neat with just a boarder stitch all the way round.

There you go – all done…. Three cheers for you…. I hope you have fun and enjoy!


Happy Xmas Felting


Read more of the scrapboxx newsletter HERE


Saturday, December 13, 2008

A bit of a catch up before the new year hits me...


2007 Photo Shoot....My Sweet Storm


SHhh Santa can hear us...Now you might have seen this LO featured on the last page of SM vol 10 no 8... it did get me excited.. i then knew it was going to be in the next mag too.. so when i got SM vol 10 no 9 i looked everywhere for it in the mag...and the only spot it was in was the contents page... OK so i wonder what happened!!! well lets just say there wasn't a spot for it as the assigned gallery was full so they left it in the contents page...hmmmm!!! so now you know who it belongs too .... ME!!!!

Now onto my Master's stuff that I entered.....i didn't really want to put this up just yet as I really would have like to have seen the mag... i feel quite embarrassed about my entry now...after reading what everyone is saying in the forums.... but this is me..... sometimes I have good stuff and sometimes it's just OK... it's never OMG WOW!!!..... anyway i have a preggie brain and my emotions are all over the place.... i can't make sense of myself let alone everyone else!

Single LO... Hula Hoop... this is my all time favorite LO!


2009 Calender.... I have big plans for this next year.... i am going to treat it like a journal and fill the squares with big numbers, scraps of scraps, tickets, appointments, events etc.... i will upload each month as i finish it.... i really do like my calender!Oh yeah and all the pictures are my girls art work they have created all this year.... I just adore there art!!!


My keepsake is for my friend RAGS she is moving to Perth and I am going to miss her like mad! We do all sorts of silly things together and laugh lots!!!! This is like a mini stage of her and I.... i totally sux at OTP but rags loves it.... that's all that matters really!!


So that is it............. and before I go... I would like to congrats all the girls that took part in the masters and to all the girls that got a HM..... apparently i got one....i think they must have had there eyes closed at the time! But the biggest CONGRATS goes to the top ten well done girls... i hope you all enjoy your year and if you find that the prizes are all too much i can give you my email addy and help you off load some!!!! lmao!

I hope to show you my exciting new news soon..... the 18th is the day i get to see this peanut .... it has been a hard couple of weeks with puking so much!

thanks for stopping by...miss wally...mwahxx

Saturday, December 6, 2008

some new scrappie news....

You can now find me over here..... cool yeah!

Make sure you come and play and check out all the others girls that have joined the team!

here's the link again...............aussie scrapjack

oh and I have other news .............. the new no: could be 5 in this house....

mwah xx

Wednesday, November 19, 2008

Some New Creations....


"123 Click"

A fun LO - I used a plastic food chopping board.... I notice that Ki memories has some cool plastic backgrounds out... I have not been able to get any yet... So I made my own....lol Any way you can pick up plain or patterned plastic chopping boards cheap.... so why wait - go and get some... I stamped the background with paint and corrgrated card... punch holes and blanket stitch with coloured thick rope.... and used some foam....

Idea: With your cuttlebug (if you have one) and the scraps of the plastic chopping board.... cut out some alphas and even emboss them. It's like using plastic milk containers. i hope you have a few new things to play with and try out...

"Holly & Storm"

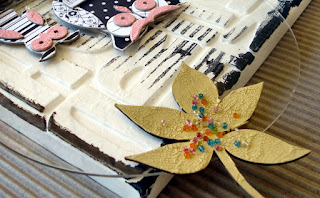
Here I have used all odd HS CB letters for the background and coated it with a couple of layers of paint.... I also used some corrugated card from a pizza box and some goodies from Tatum... am loving pins, lace, flowers cut in half, pearls and big spottie brads!!!

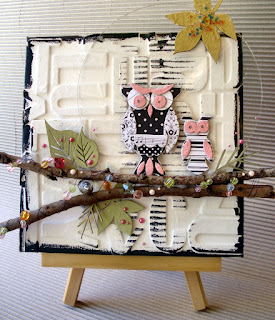
"Owl Canvas"


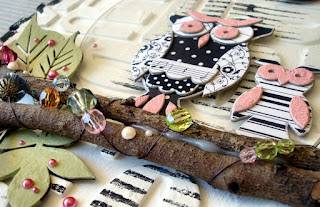
Ah a Owl Canvas and some detail....... it's about time i scrapped that owl.... so i drew inspiration from Melissa Corbett who is a SM master for 2007 ..I loved her owl canvas she created in SM vol 10 no2 .......Go check it out if you have the mag....... you will love it..

thanks for looking and have a goodie...mwah xx

Saturday, November 15, 2008

Some Tips & Techniques to try...


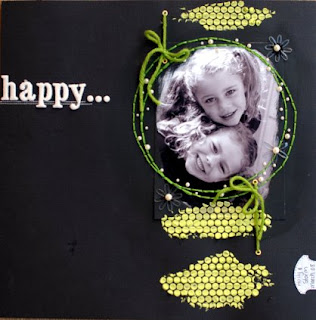
Dimensional Masking with Mesh
How to:
  1. Mix some paint with your texture paste.
  2. Use some masking tape to hold one end of the mask down.
  3. Now apply the mixture with a rub-on stick randomly.
  4. Lift the mask after revealing your pattern and design.
  5. Repeat the step again until you are happy with your design.
  6. Allow to dry and scrap your layout.
Have fun creating this one....

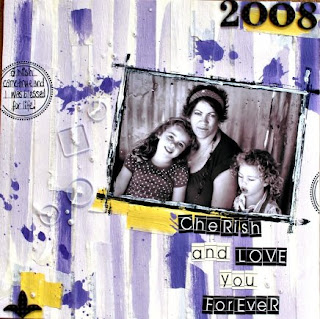
Creative backgrounds using Masking Tape
How to:
  1. Line your bench with strips of masking tape - enough to cover a 12 x 12 sheet of CS.
  2. Paint all the strips in white paint first.
  3. Choose your color and paint the strips going from darker to lighter - create lighter shades by watering the paint down.
  4. Paint one of the strips in a contrasting color and allow to dry.
  5. Now tear the painted strips off the bench and place randomly on your CS.
  6. Dilute the main color and with your paint brush flick it over your background.
  7. Scrap your layout.
Tip: Covering the masking tape with white first helps hide the yellowish shade and when coloring washing it is more true to color.

Have fun creating this one.

These are a couple of the fun and easy techniques for you to try... so when you have ago let me know and I will come over and check it out....mwah

Friday, November 14, 2008

ha ha ha......i know someones secret.....

One more sleep and all will be revealed!!!!!!!!!!!!!!


Mwah!!!!!

Tuesday, November 11, 2008

Totally Embellished.......

Ok.... its time to use those leftover odd chipboard letters.... so grab your paint and letters and get to it.... so this is where you start...just lay them out and then glue down....
Next pick your colour of paint and get slapping it on.... i have done four coats here....
Now scrap it...... here's mine... i love it.... its got tones of embellies and loads of texture with it..... I am going to frame this in one of those 12 x 12 shadow boxx's...gee i hope it will fit...lol


####LO out for publication####


Check out some of the detail.........
Oh yes and heres another one.... i used the heidi swapp chipboard letters and painted this background a steel colour....Oh and this is for someone special.... do you recognise this boy.... I really hope you have a go... and if you do i want to see it.... you will love this idea.... i know i do..... mwah xx

Wednesday, November 5, 2008

Go Create Miss Wally...............


Here's a LO I created in the wee hours.... I am a visual learner and when I am not in the mood reading instructions will do my head in...... So I thought that I would post some photo steps.....The background paper is by Collage Press and I have used two background stamps from stampin-up plus their inks pads.... So lightly ink parts of the stamps and randomly stamp them onto the pattern paper..... too easy....I love random...but you probably know that!...plus you can see I used some of Ann Lederhose chippy's too.....
For the boarder around the photo....I used black and white paint and a scrap piece of cardstock...run the edge of the cardstock thru the black paint and stamp the edges of your photo 3 to 4 times...then repeat with white .... it just leaves such a cool effect!... thats it... too easy as well....thanks for stopping by...Mwah!

####LO out for publication####


Here's another LO I created last night -"snails"..... check these Tim Holtz crackle paints out....OMG they are awesome.... saves a lot of time if you like that crackle effect...Well I do that's for sure.....So of course they come in heaps of different colors and go with everything else of his but wait there's more....only joking!!!! lmao...anyway I used it on the wood buttons....Oh and I also have a couple of Petrina's McDonald chippy's on here..... I used tissue paper and Mod Podge to cover them...I had fun creating this LO....I am off to create a "ART Journal".............Mwah...

Monday, November 3, 2008

Beads..................


Here's a LO I created last night using Donna's Beads that she had made me.... They were beaded scrolls and I just straighten them so they were more like twigs as this worked better with the look I wanted.... Thanks HB they are awesome and I had fun using them! Mwah...

Friday, October 31, 2008

oct newsletter is out.....


The Oct - Boxx Newsletter is out..... check it out for some so cool scrapping inspiration!
here's two projects i did..... the first one is OTP and the second one it the BOS...i also used the alpha sticker sheet as a pattern paper... by removing some of the alphas....Mwah

Stuff from the Oct retreat......


All i can say is that i had an absolute ball.... meeting all the girls and scrapping my little crazy heart out.....of course i was rather LOUD.... but i would not change it for the world... that's just who i am......and there are girls there that are just as loud!!!!! lmao!!!!
So as you can see i managed to scrap everything... all i need to do is add journaling and some pics to some of the mini books.... Miss Mardi and Miss Nic are totally awesome chicks and they kept us busy the whole time.... i learnt some great new tricks from not just the teachers!!!! everyones projects totally rocked!!!!
oh and check out my new tote...... it's the yummiest tote ever!!!!! you got to get one... check out the BOXX SHOP....... and what total spunks are those chicks at the top!!!! lmao.... Mwah