http://thepaintbrushgoesspottie.blogspot.com.au/p/resume.htmlhttp://thepaintbrushgoesspottie.blogspot.com.au/p/publications.htmlhttp://thepaintbrushgoesspottie.blogspot.com.au/p/doodle-feathers.html 

Wednesday, November 19, 2008

Some New Creations....


"123 Click"

A fun LO - I used a plastic food chopping board.... I notice that Ki memories has some cool plastic backgrounds out... I have not been able to get any yet... So I made my own....lol Any way you can pick up plain or patterned plastic chopping boards cheap.... so why wait - go and get some... I stamped the background with paint and corrgrated card... punch holes and blanket stitch with coloured thick rope.... and used some foam....

Idea: With your cuttlebug (if you have one) and the scraps of the plastic chopping board.... cut out some alphas and even emboss them. It's like using plastic milk containers. i hope you have a few new things to play with and try out...

"Holly & Storm"

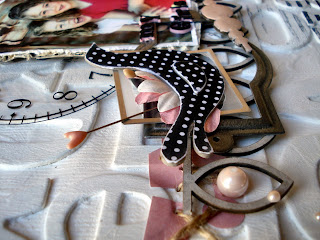
Here I have used all odd HS CB letters for the background and coated it with a couple of layers of paint.... I also used some corrugated card from a pizza box and some goodies from Tatum... am loving pins, lace, flowers cut in half, pearls and big spottie brads!!!

"Owl Canvas"


Ah a Owl Canvas and some detail....... it's about time i scrapped that owl.... so i drew inspiration from Melissa Corbett who is a SM master for 2007 ..I loved her owl canvas she created in SM vol 10 no2 .......Go check it out if you have the mag....... you will love it..

thanks for looking and have a goodie...mwah xx
Saturday, November 15, 2008

Some Tips & Techniques to try...


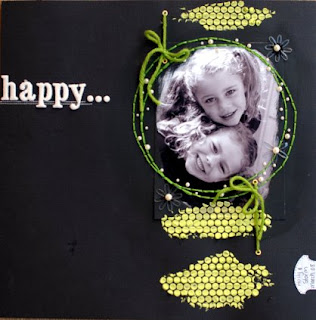
Dimensional Masking with Mesh
How to:
  1. Mix some paint with your texture paste.
  2. Use some masking tape to hold one end of the mask down.
  3. Now apply the mixture with a rub-on stick randomly.
  4. Lift the mask after revealing your pattern and design.
  5. Repeat the step again until you are happy with your design.
  6. Allow to dry and scrap your layout.
Have fun creating this one....

Creative backgrounds using Masking Tape
How to:
  1. Line your bench with strips of masking tape - enough to cover a 12 x 12 sheet of CS.
  2. Paint all the strips in white paint first.
  3. Choose your color and paint the strips going from darker to lighter - create lighter shades by watering the paint down.
  4. Paint one of the strips in a contrasting color and allow to dry.
  5. Now tear the painted strips off the bench and place randomly on your CS.
  6. Dilute the main color and with your paint brush flick it over your background.
  7. Scrap your layout.
Tip: Covering the masking tape with white first helps hide the yellowish shade and when coloring washing it is more true to color.

Have fun creating this one.

These are a couple of the fun and easy techniques for you to try... so when you have ago let me know and I will come over and check it out....mwah

Friday, November 14, 2008

ha ha ha......i know someones secret.....

One more sleep and all will be revealed!!!!!!!!!!!!!!


Mwah!!!!!

Tuesday, November 11, 2008

Totally Embellished.......

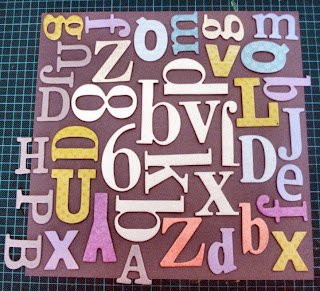
Ok.... its time to use those leftover odd chipboard letters.... so grab your paint and letters and get to it.... so this is where you start...just lay them out and then glue down....
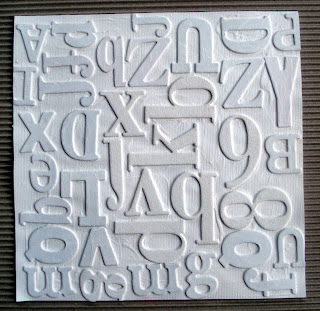
Next pick your colour of paint and get slapping it on.... i have done four coats here....
Now scrap it...... here's mine... i love it.... its got tones of embellies and loads of texture with it..... I am going to frame this in one of those 12 x 12 shadow boxx's...gee i hope it will fit...lol


####LO out for publication####


Check out some of the detail.........
Oh yes and heres another one.... i used the heidi swapp chipboard letters and painted this background a steel colour....Oh and this is for someone special.... do you recognise this boy.... I really hope you have a go... and if you do i want to see it.... you will love this idea.... i know i do..... mwah xx

Wednesday, November 5, 2008

Go Create Miss Wally...............


Here's a LO I created in the wee hours.... I am a visual learner and when I am not in the mood reading instructions will do my head in...... So I thought that I would post some photo steps.....The background paper is by Collage Press and I have used two background stamps from stampin-up plus their inks pads.... So lightly ink parts of the stamps and randomly stamp them onto the pattern paper..... too easy....I love random...but you probably know that!...plus you can see I used some of Ann Lederhose chippy's too.....
For the boarder around the photo....I used black and white paint and a scrap piece of cardstock...run the edge of the cardstock thru the black paint and stamp the edges of your photo 3 to 4 times...then repeat with white .... it just leaves such a cool effect!... thats it... too easy as well....thanks for stopping by...Mwah!

####LO out for publication####


Here's another LO I created last night -"snails"..... check these Tim Holtz crackle paints out....OMG they are awesome.... saves a lot of time if you like that crackle effect...Well I do that's for sure.....So of course they come in heaps of different colors and go with everything else of his but wait there's more....only joking!!!! lmao...anyway I used it on the wood buttons....Oh and I also have a couple of Petrina's McDonald chippy's on here..... I used tissue paper and Mod Podge to cover them...I had fun creating this LO....I am off to create a "ART Journal".............Mwah...

Monday, November 3, 2008

Beads..................


Here's a LO I created last night using Donna's Beads that she had made me.... They were beaded scrolls and I just straighten them so they were more like twigs as this worked better with the look I wanted.... Thanks HB they are awesome and I had fun using them! Mwah...